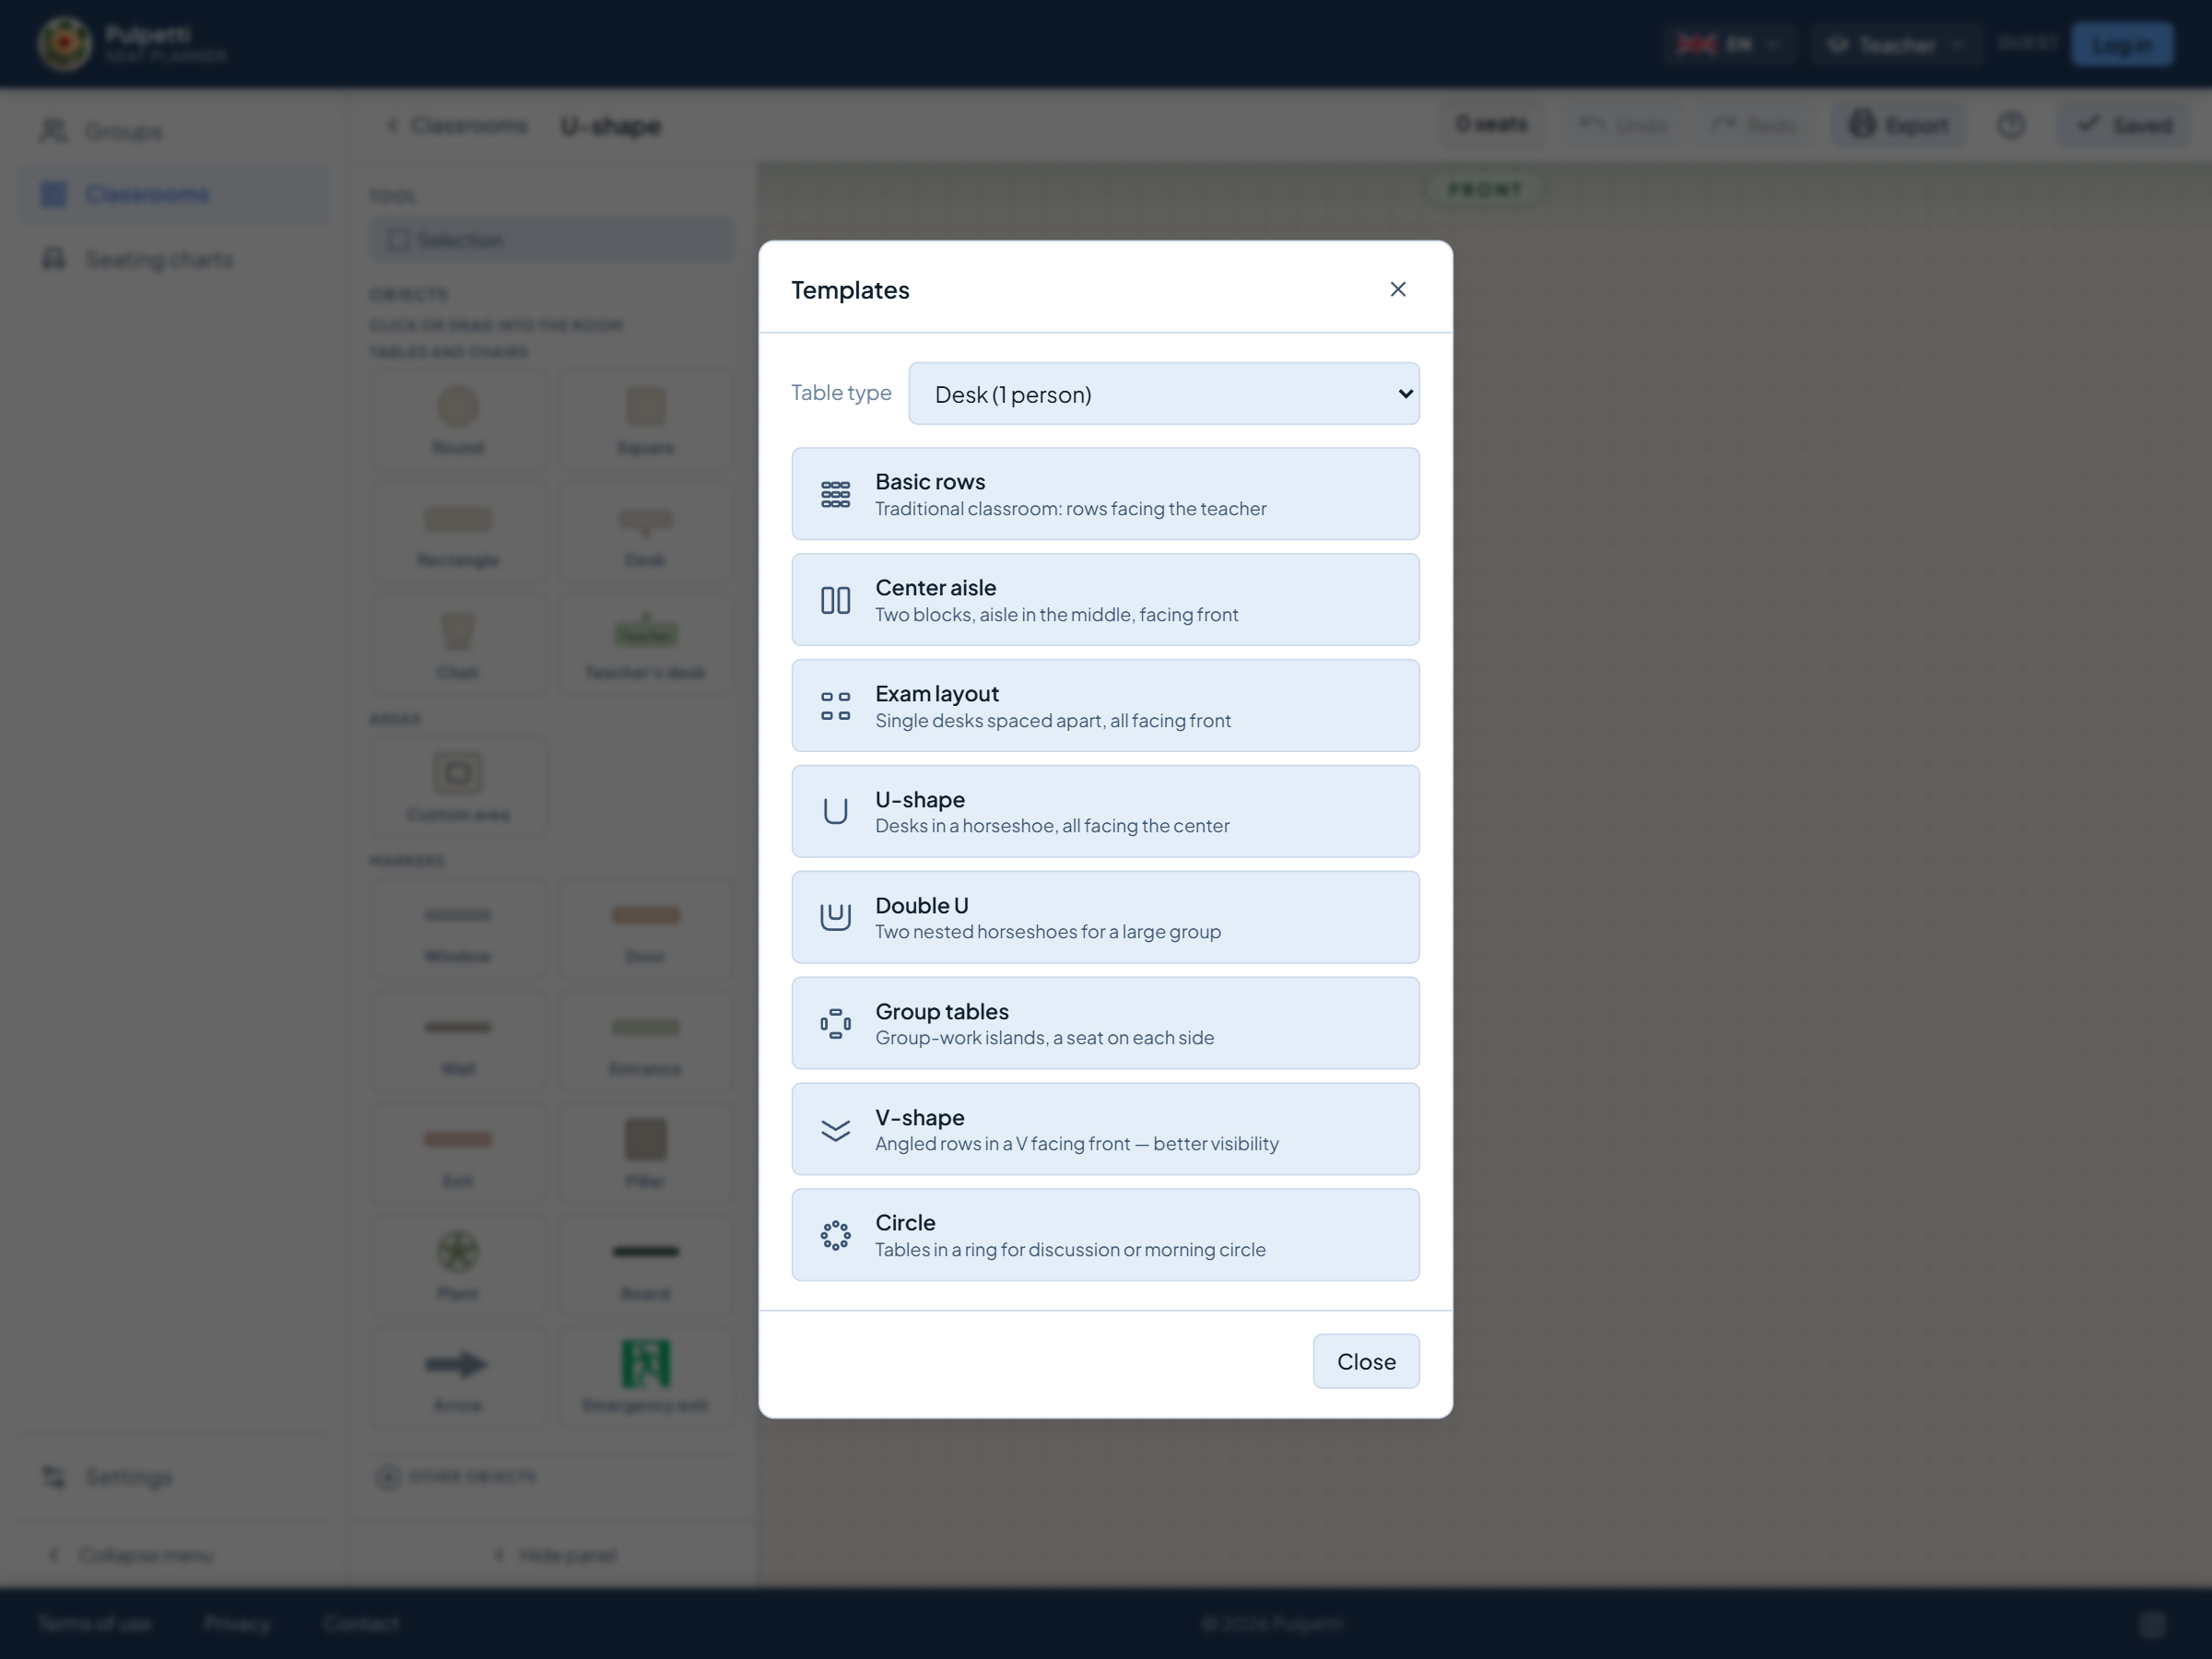
Eight classroom layouts at a glance
Every classroom layout is a trade between three things: who can see the board, who can see each other, and how much floor the desks leave for walking. No layout wins all three, which is why most teachers end up using two or three of them over a school year. The table compares the eight common ones.
| Layout | Works best for | What it costs | Seats in a 30 × 23 ft room |
|---|---|---|---|
| Rows | independent work, direct teaching, tests | discussion: the back rows see only backs | 28 single desks |
| Pairs with a center aisle | partner work without moving desks | the aisle takes a column of seats | 32 |
| U-shape (horseshoe) | whole-class discussion, demonstrations | seats: one ring of desks along the walls | about 24 |
| Double U | discussion in a full class | the inner ring sits with its back to the outer one | about 32 |
| Group tables (pods) | group tasks, stations, project work | half the class sits sideways to the board | 28–32 in groups of four |
| V-shape (chevron) | teaching with some discussion | angled desks take more floor than rows | about 24 |
| Circle | morning circle, debate, a class meeting | no front: the board is behind someone | 20–24 |
| Exam layout | tests: distance and line of sight | roughly a third fewer seats than rows | about 20 |
The seat counts assume a room of 30 × 23 feet (9 × 7 m), a front zone of five feet kept free for the board and the teacher's desk, and a desk of 26 × 20 inches (65 × 50 cm) per student. A different room changes the numbers but not the order: rows and pairs always seat the most, a circle the fewest. How the numbers are worked out is under How much floor a layout needs.
Rows and pairs
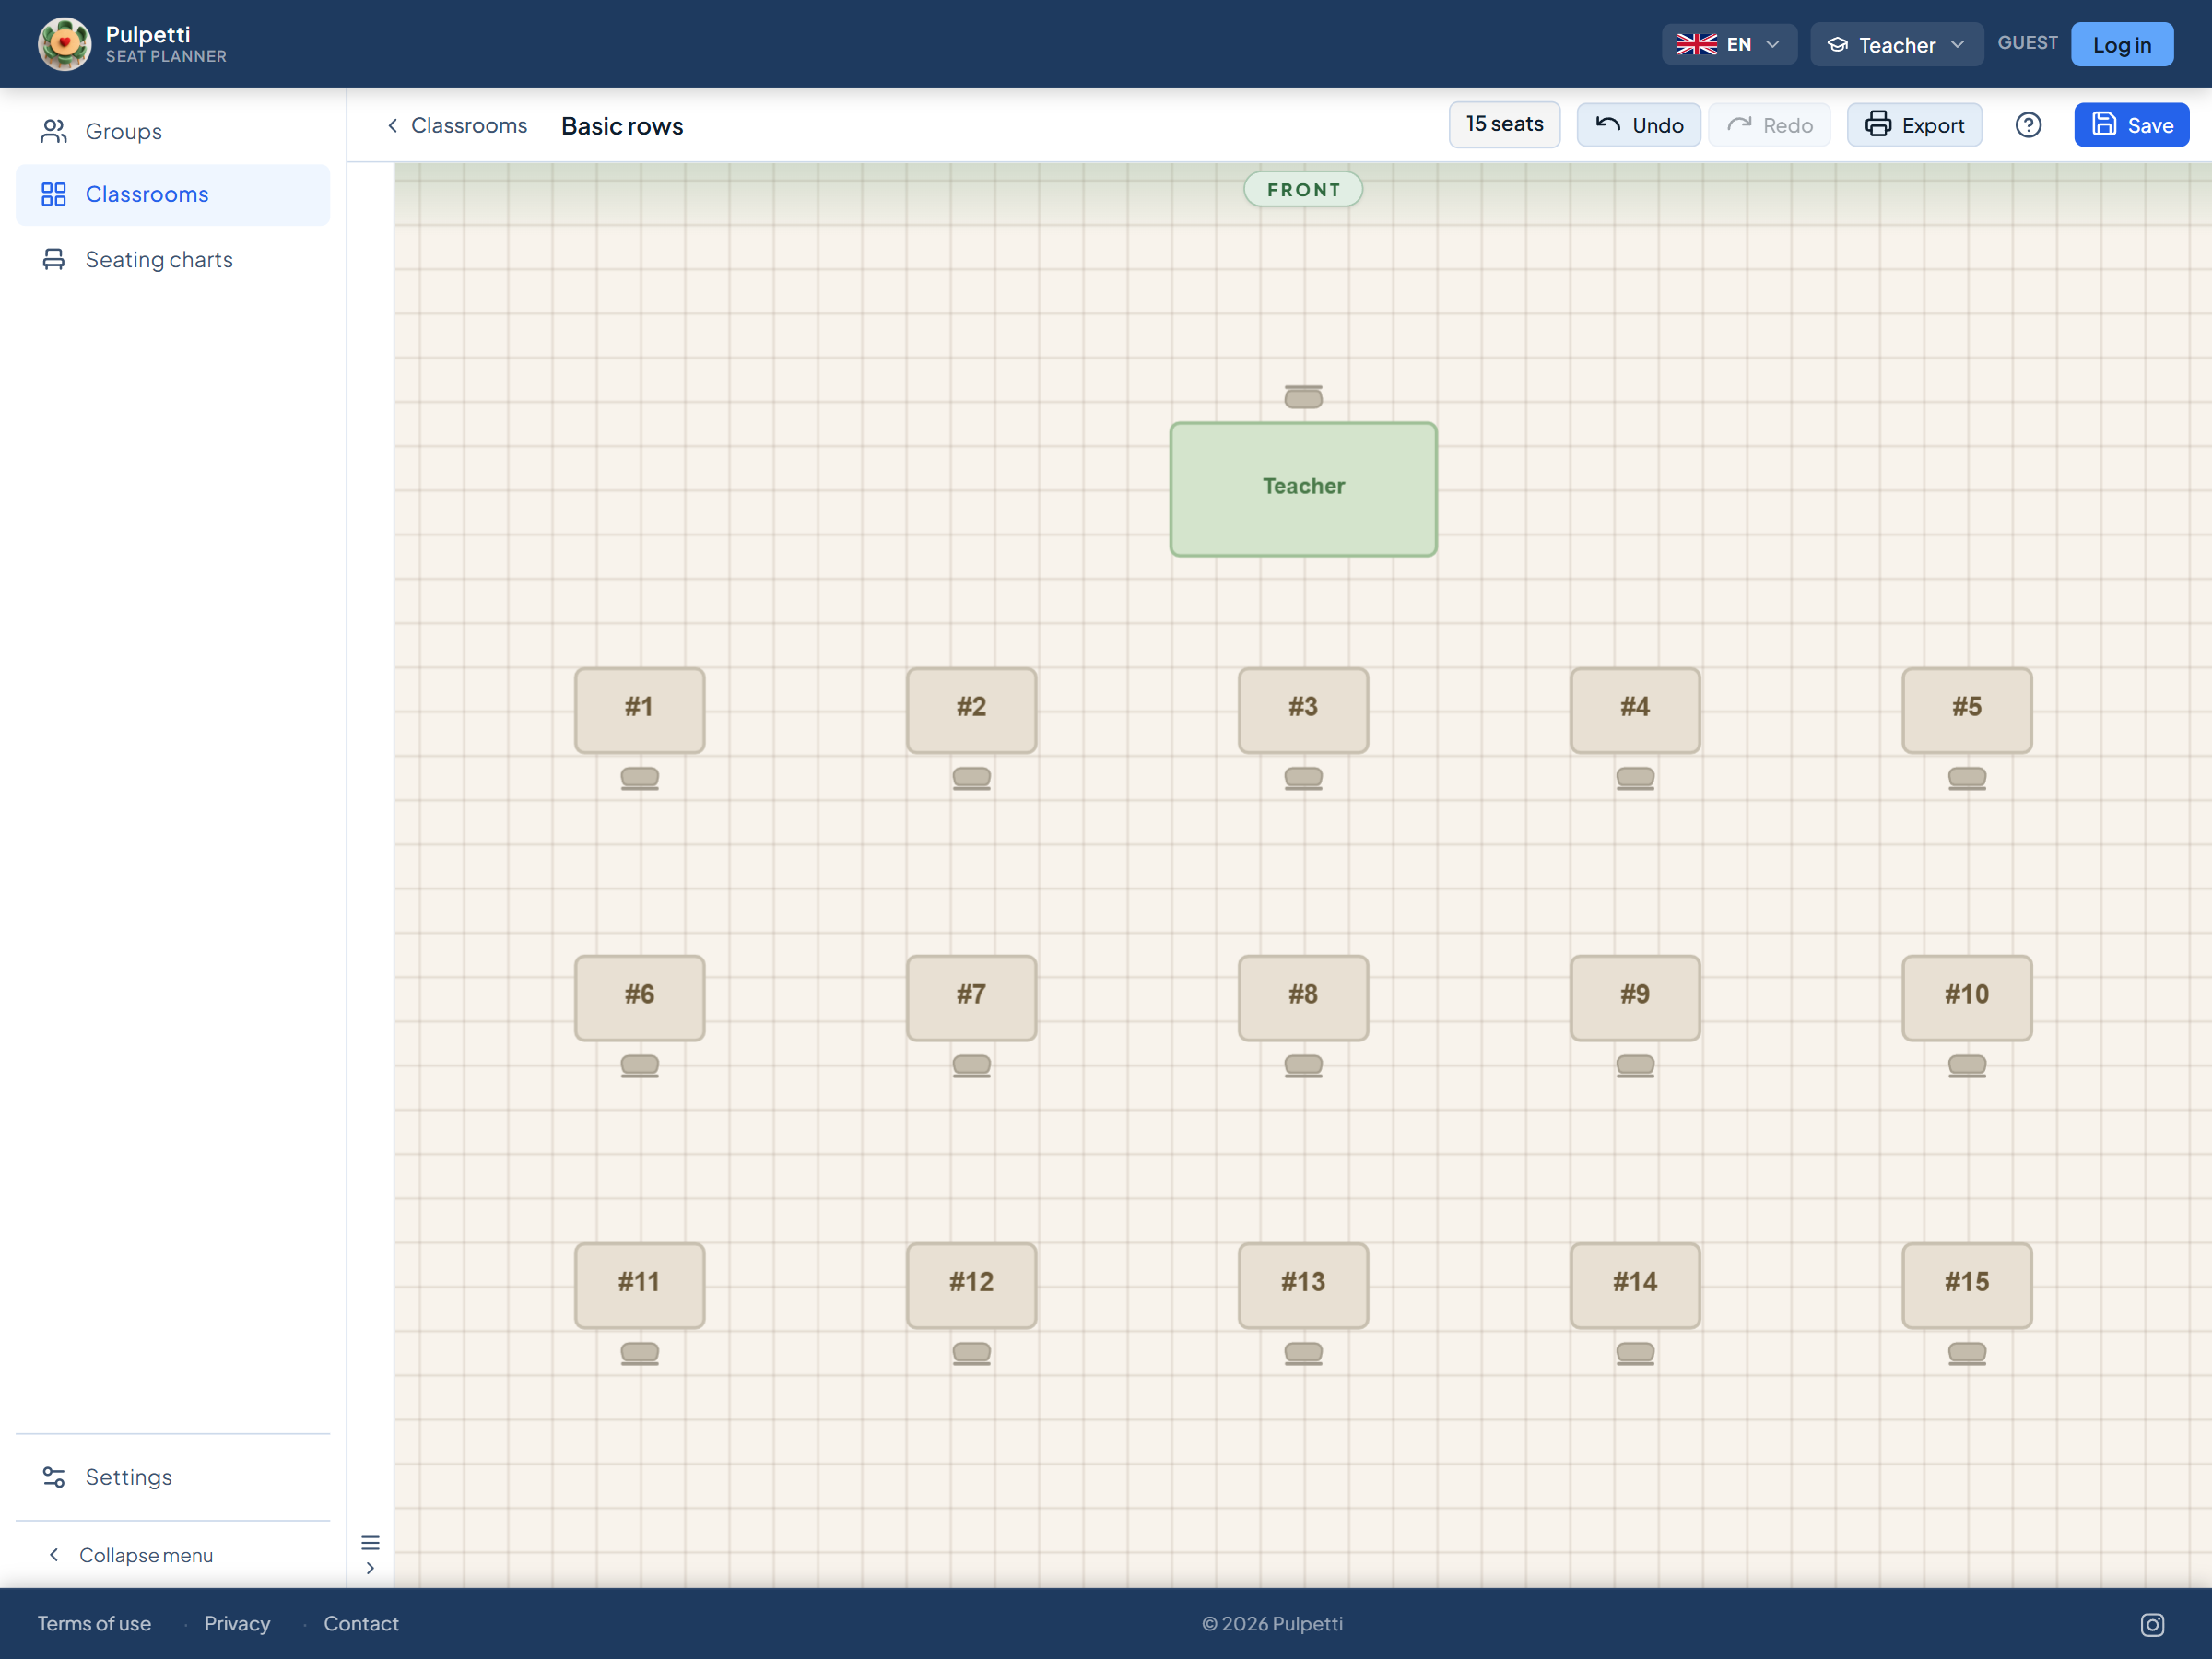
Rows are the default for a reason: every student faces the board, every desk is the same distance from its neighbor, and the room holds more students than in any other layout. They suit direct teaching and independent work, and the classroom seating guide covers why concentration holds up better in rows than at group tables.
What rows cost is discussion. A student in the fourth row talks to the backs of three rows of heads, and the conversation in a row-shaped room runs through the teacher. If the lesson is meant to be a conversation, rows work against it.
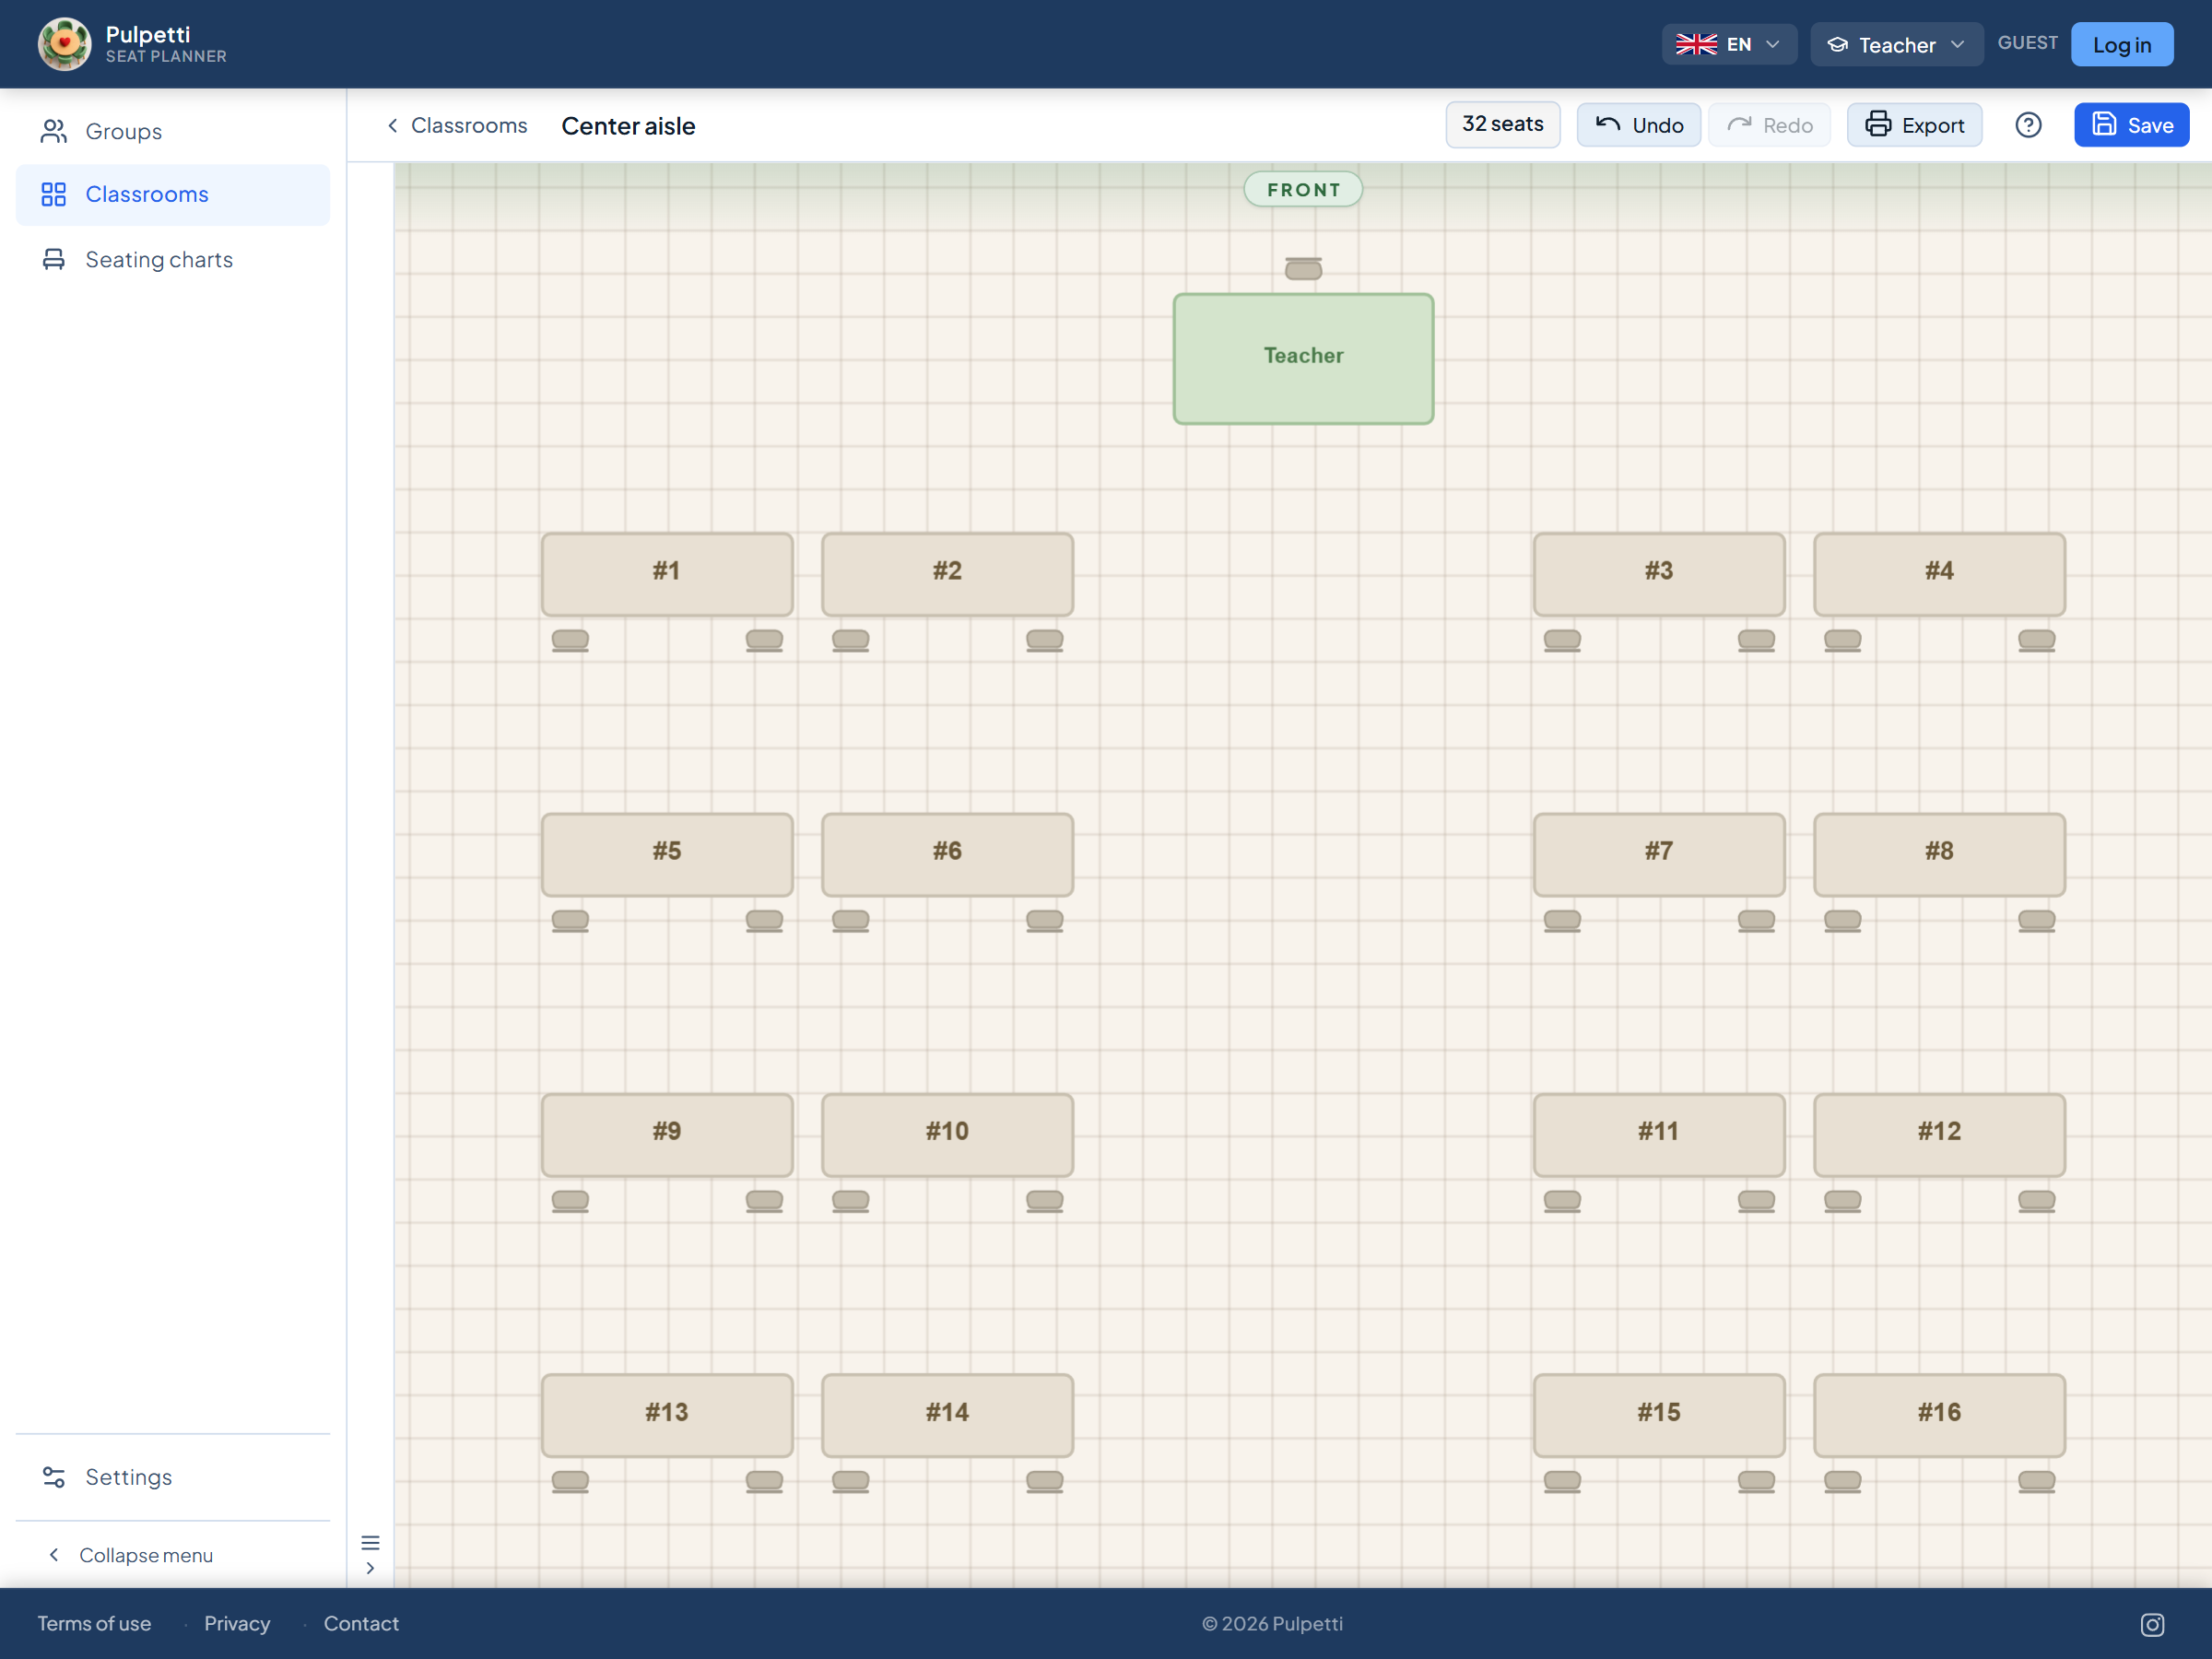
Pairs with a center aisle are the common compromise. Desks stand two by two in two blocks, and the aisle down the middle lets you reach every pair without squeezing past anyone. Partner work happens without moving furniture, and two pairs turn to face each other when you need a group of four. Because two-seat desks need only one walkway per pair, this layout fits more students than single rows.
U-shape and double U
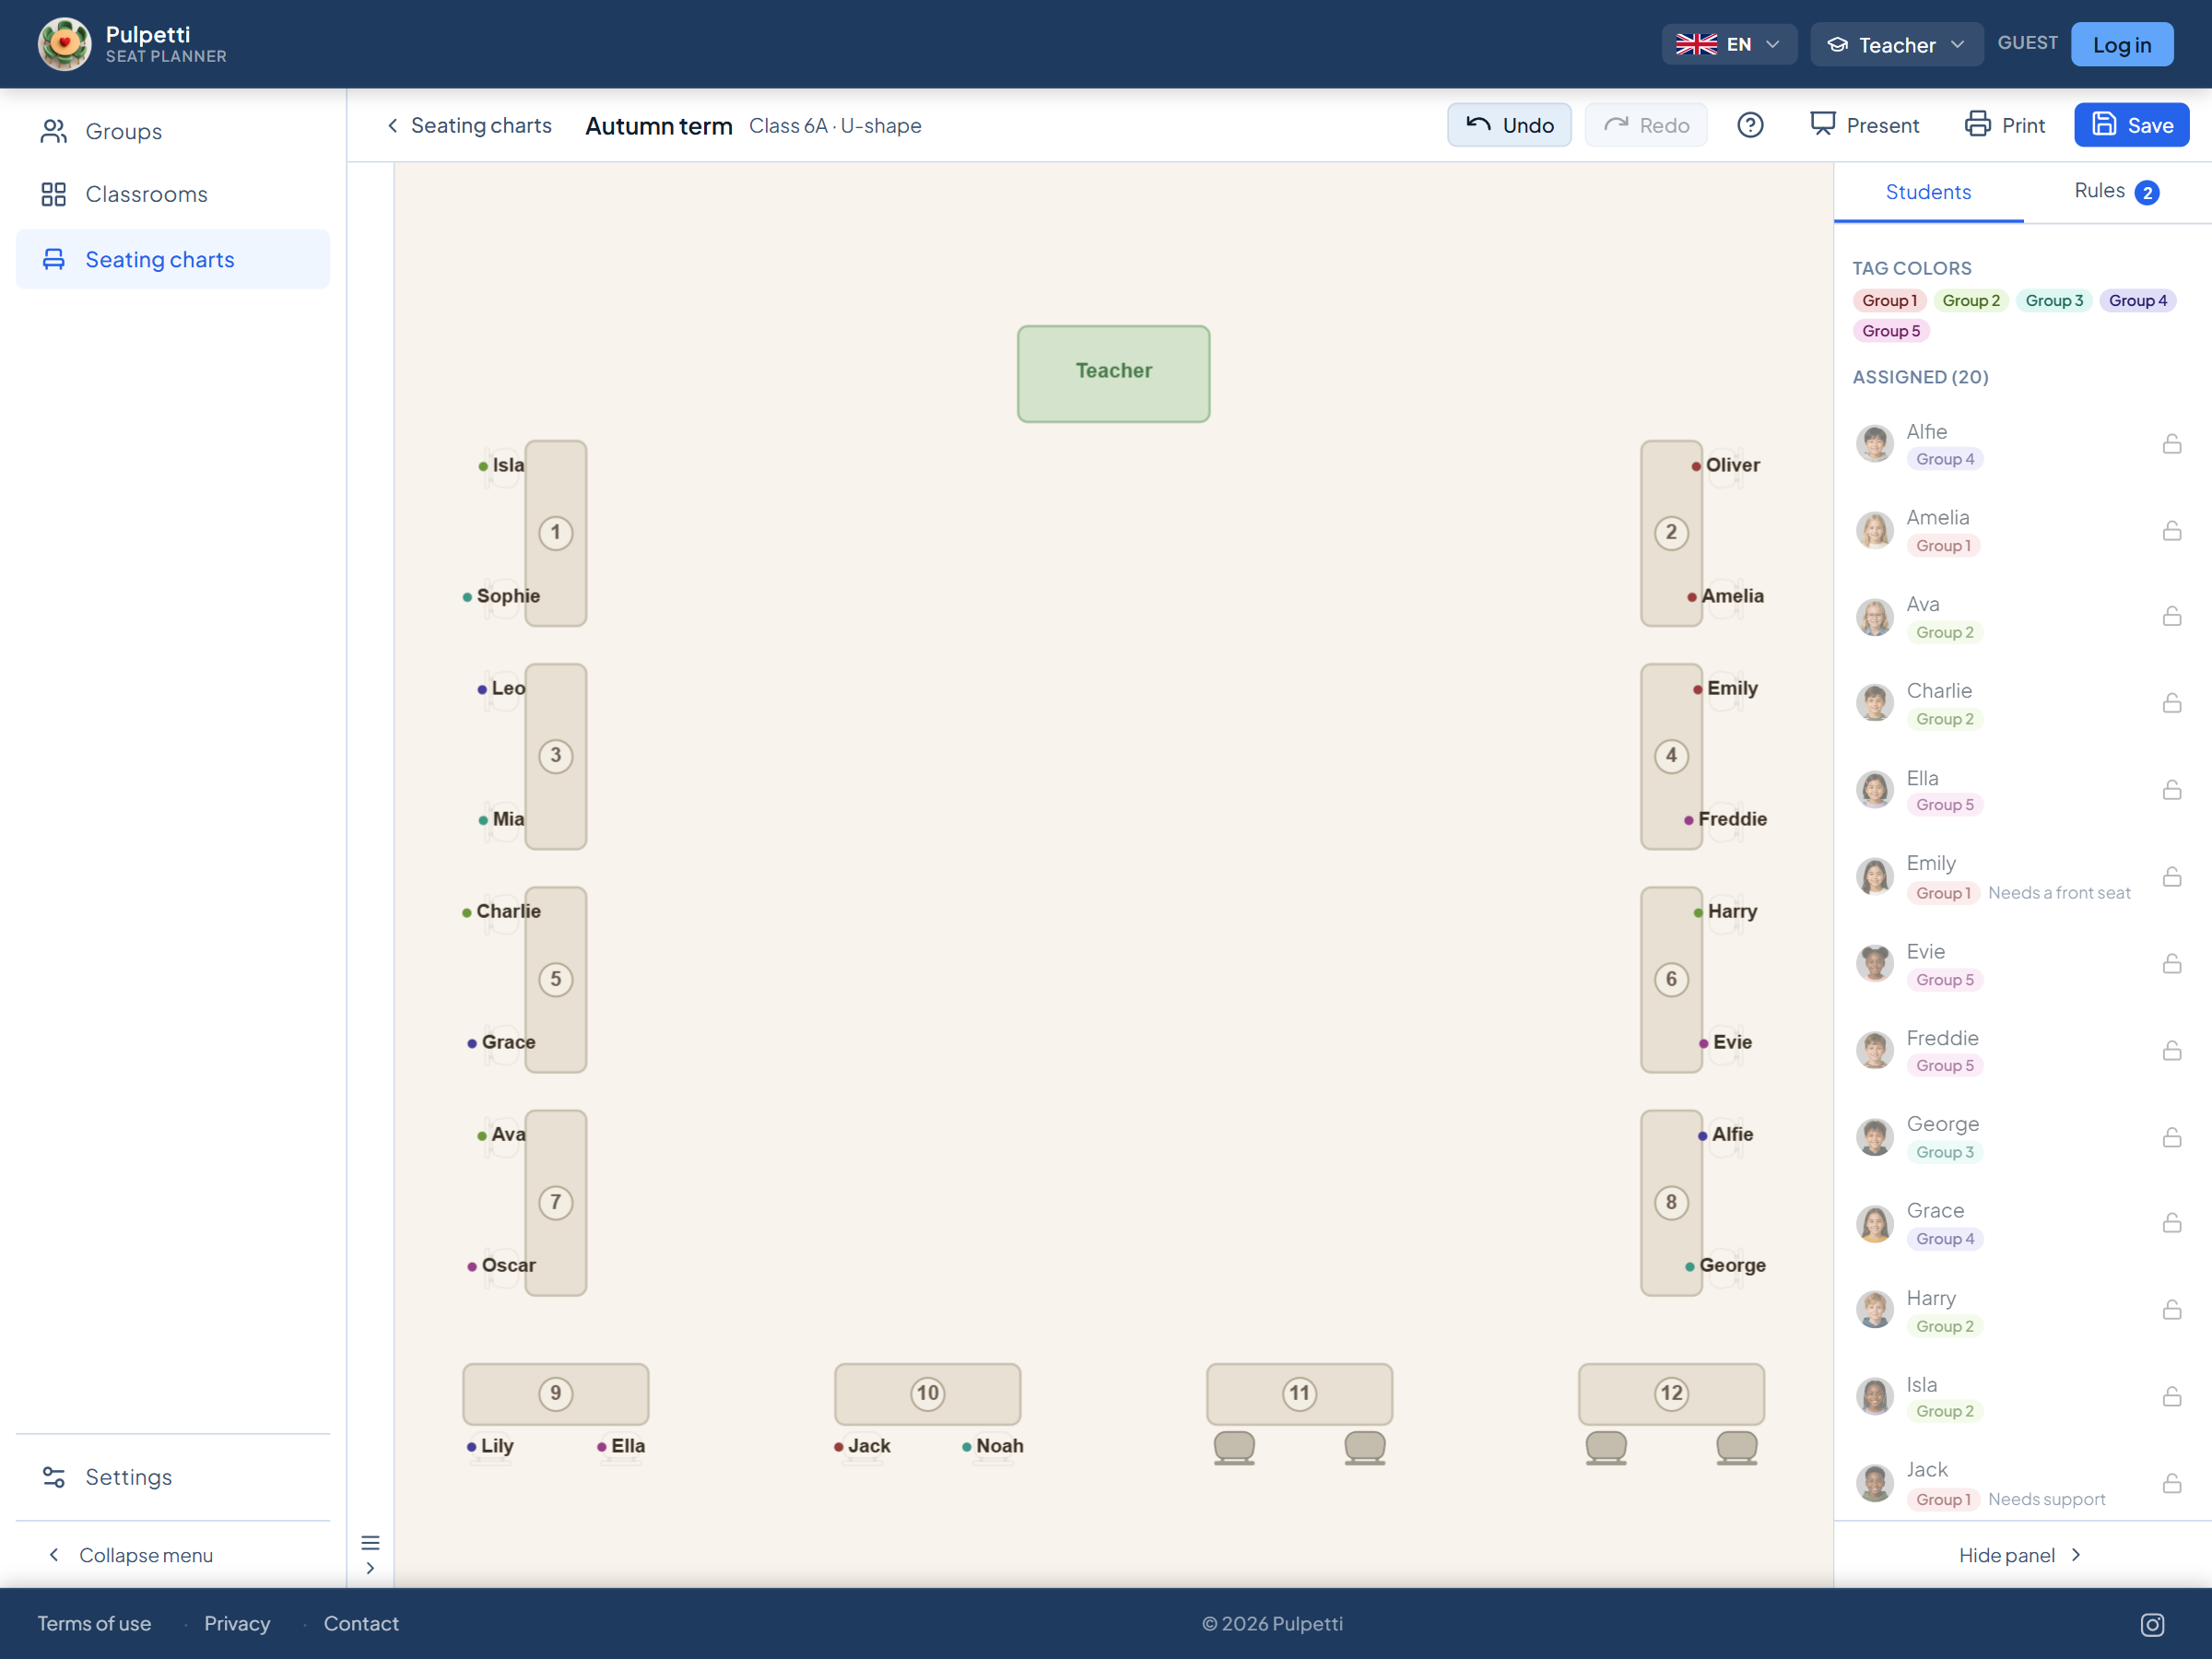
In a U-shape (also called a horseshoe) the desks run along three sides of the room, the students face into the middle, and the open end faces the board. Everyone sees everyone, and the empty floor in the middle is yours: you can walk up to any desk, and a demonstration in the middle is visible from every seat.
The cost is seats. One ring of desks along the walls holds around 24 students in an ordinary room, so a class of 30 does not fit in a single U. That is what the double U is for: a smaller horseshoe inside the larger one. It holds a full class, but the inner ring sits with its back to the outer ring — the discussion advantage holds for about half the class. If the room allows, keep the inner U short and the gap between the rings wide enough to walk through.
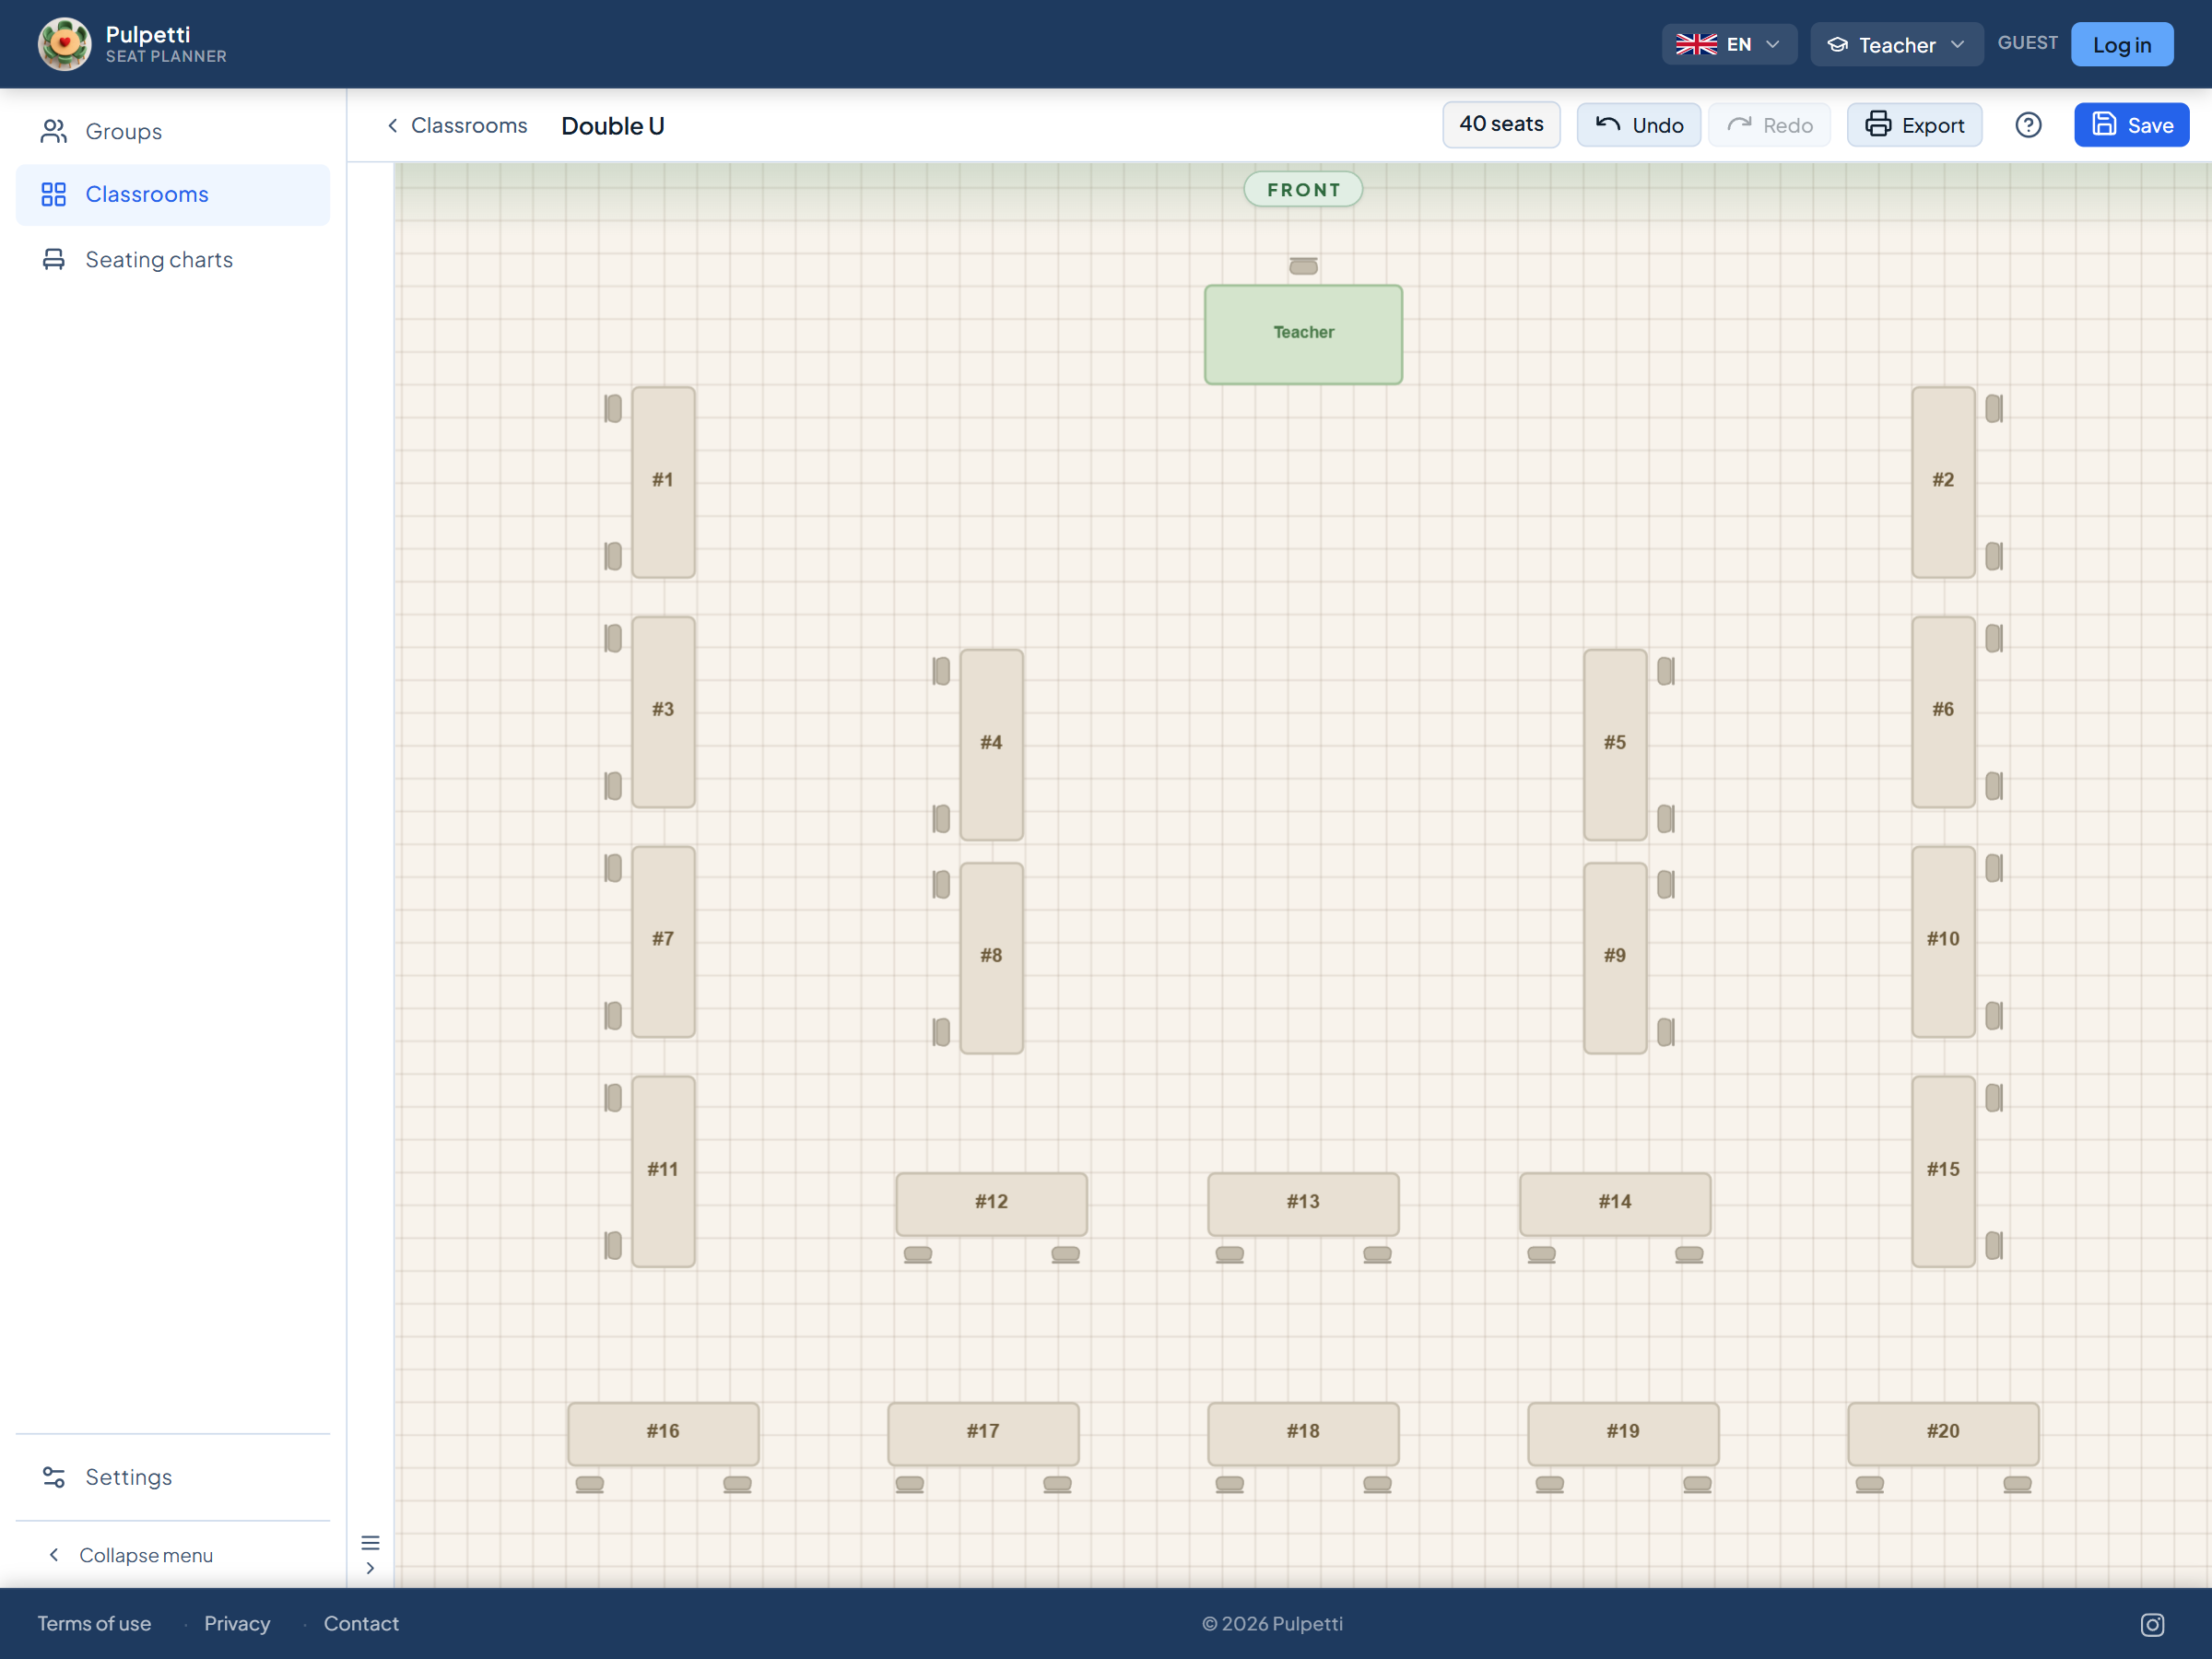
A practical detail: in a U, the students at the two ends of the arms sit sideways to the board. Seat the students who need to copy from the board at the bottom of the U, facing it.
Group tables
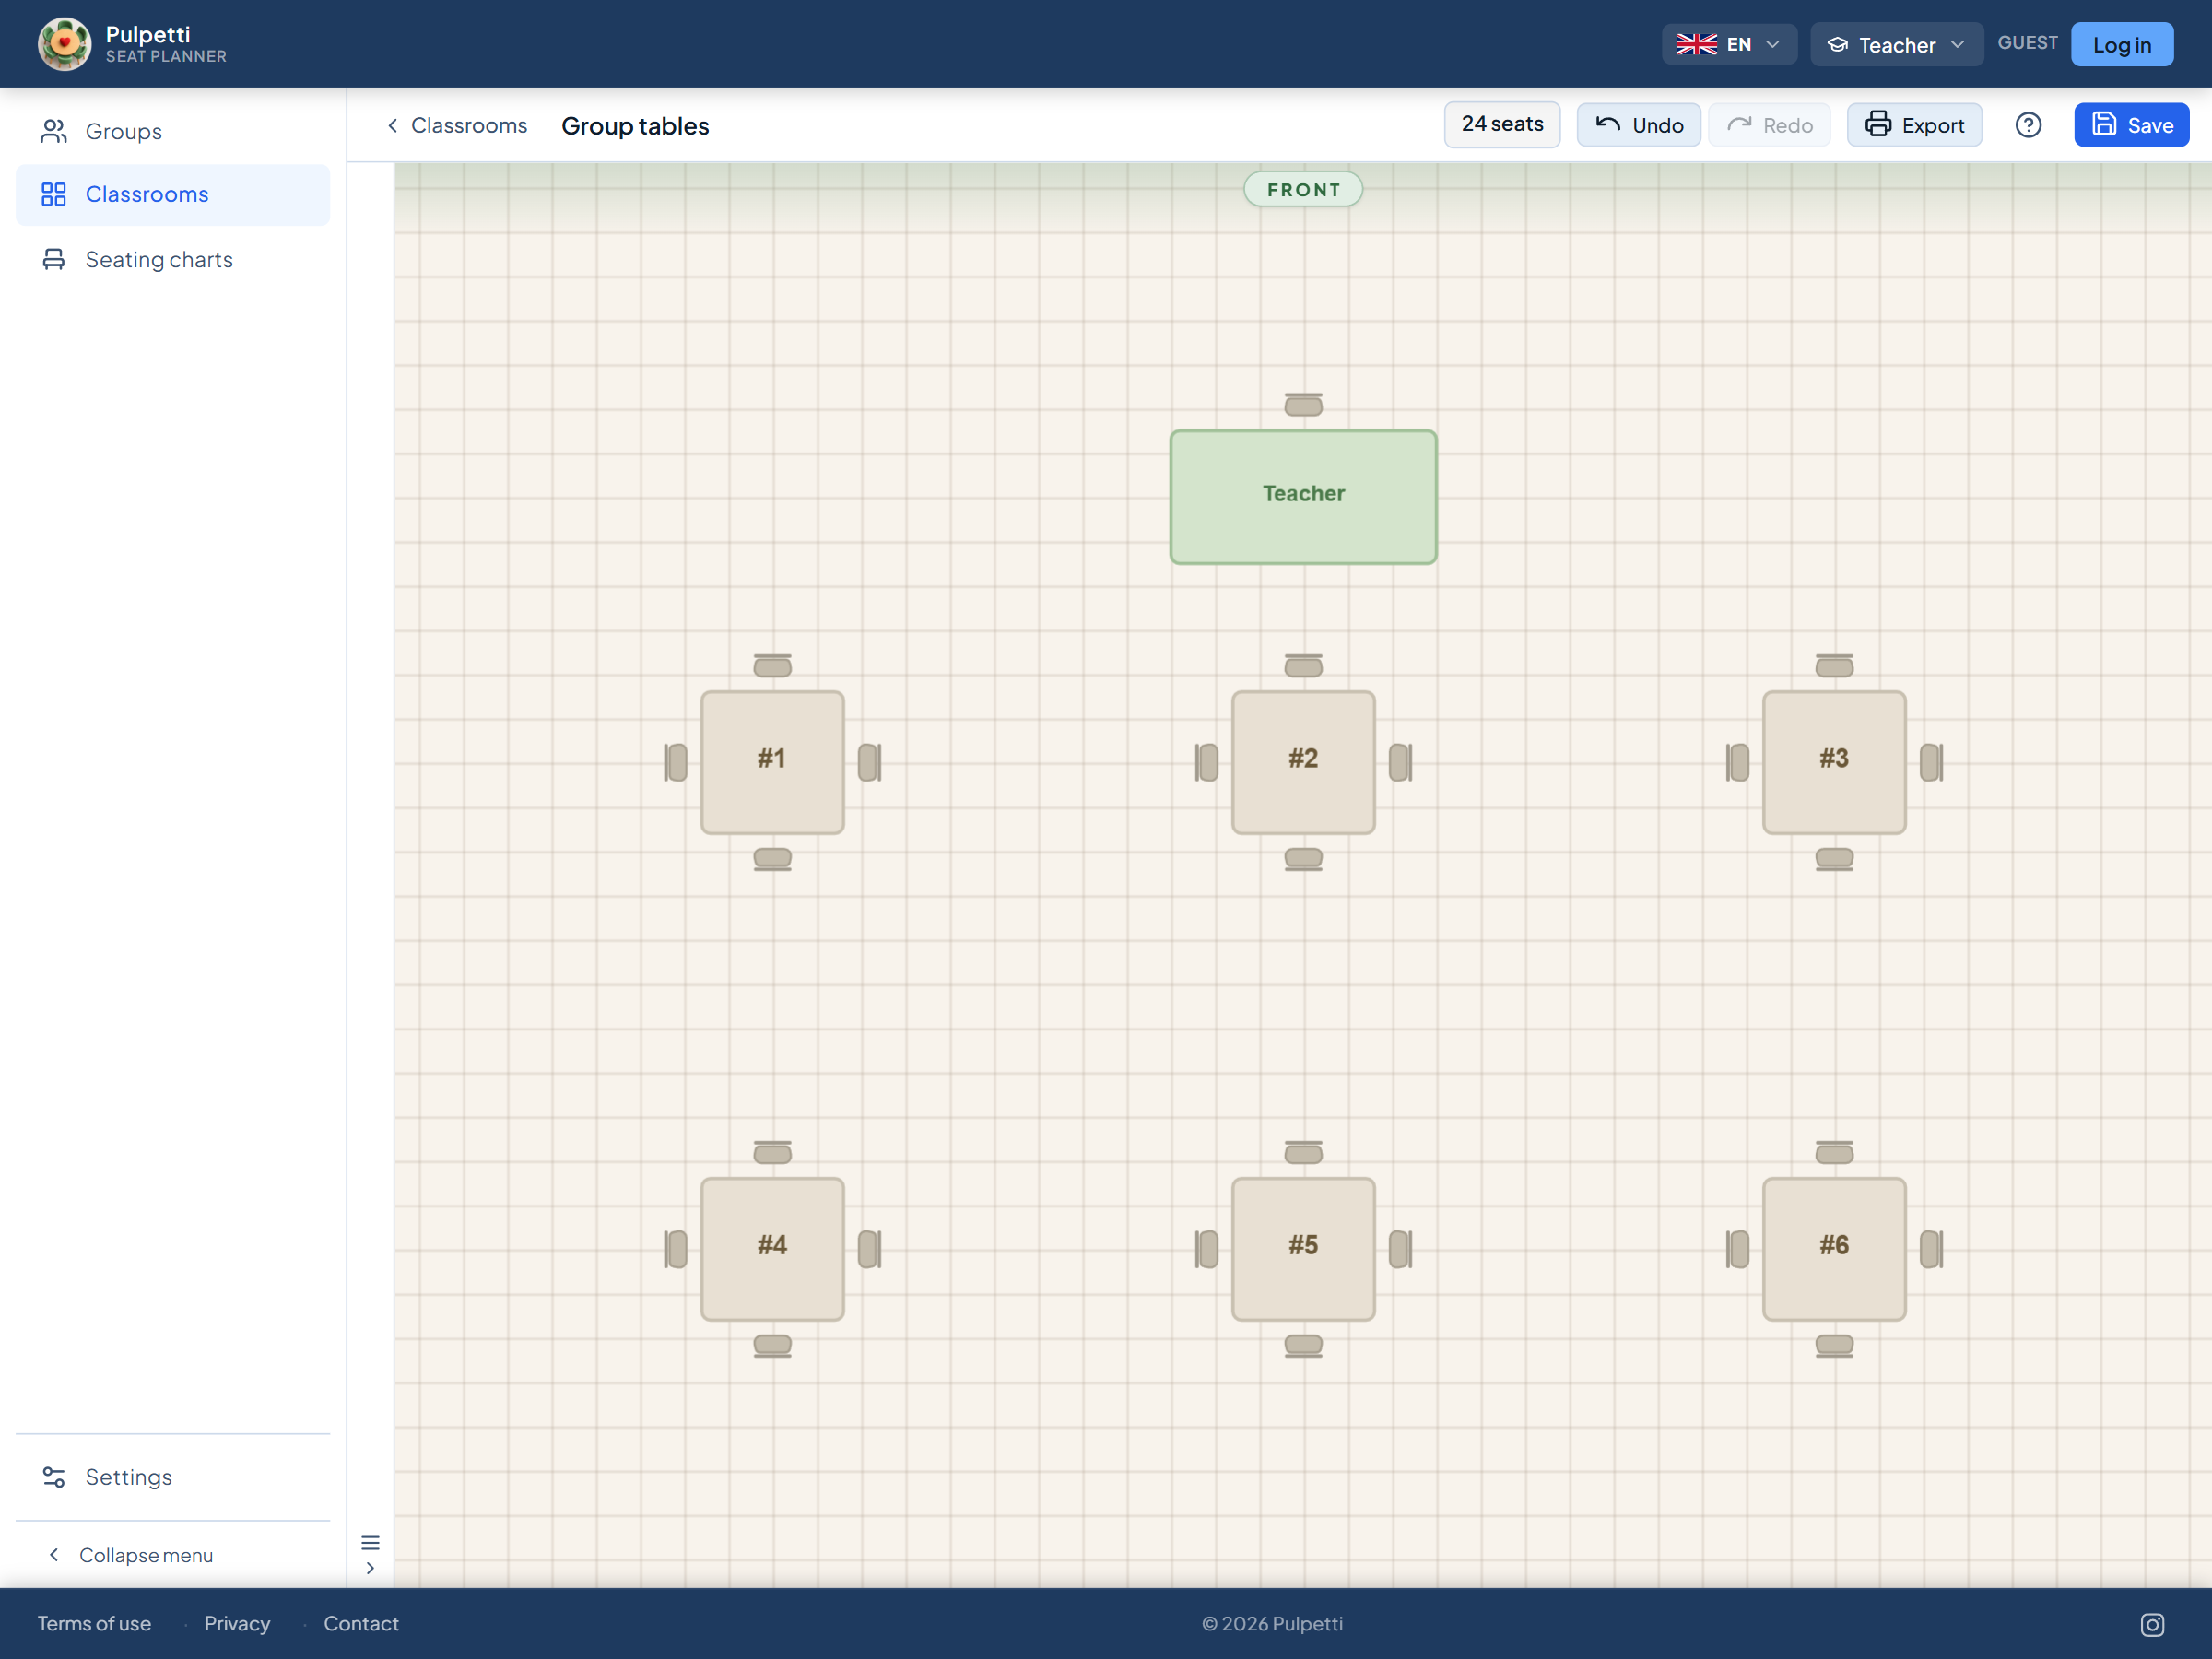
Group tables — pods, clusters or table groups — put four to six students around one surface, usually two pairs of desks pushed face to face. They are the layout for shared tasks: project work, stations, experiments, anything where the students need to talk to each other rather than to you.
Two things are worth knowing before you commit. First, half of every group sits sideways or with its back to the board. Fine for group work, tiring for a 20-minute explanation — either turn the chairs for teaching or keep group tables for the lessons that are group work. Second, faces turned toward each other invite talk whatever the task is. That is the point during a shared task and the problem during independent work.
Groups of four are the easiest to manage: everyone can reach the middle of the table and nobody is left at a corner. Trapezoid tables let you make hexagons of six, but six is already two conversations.
V-shape and circle
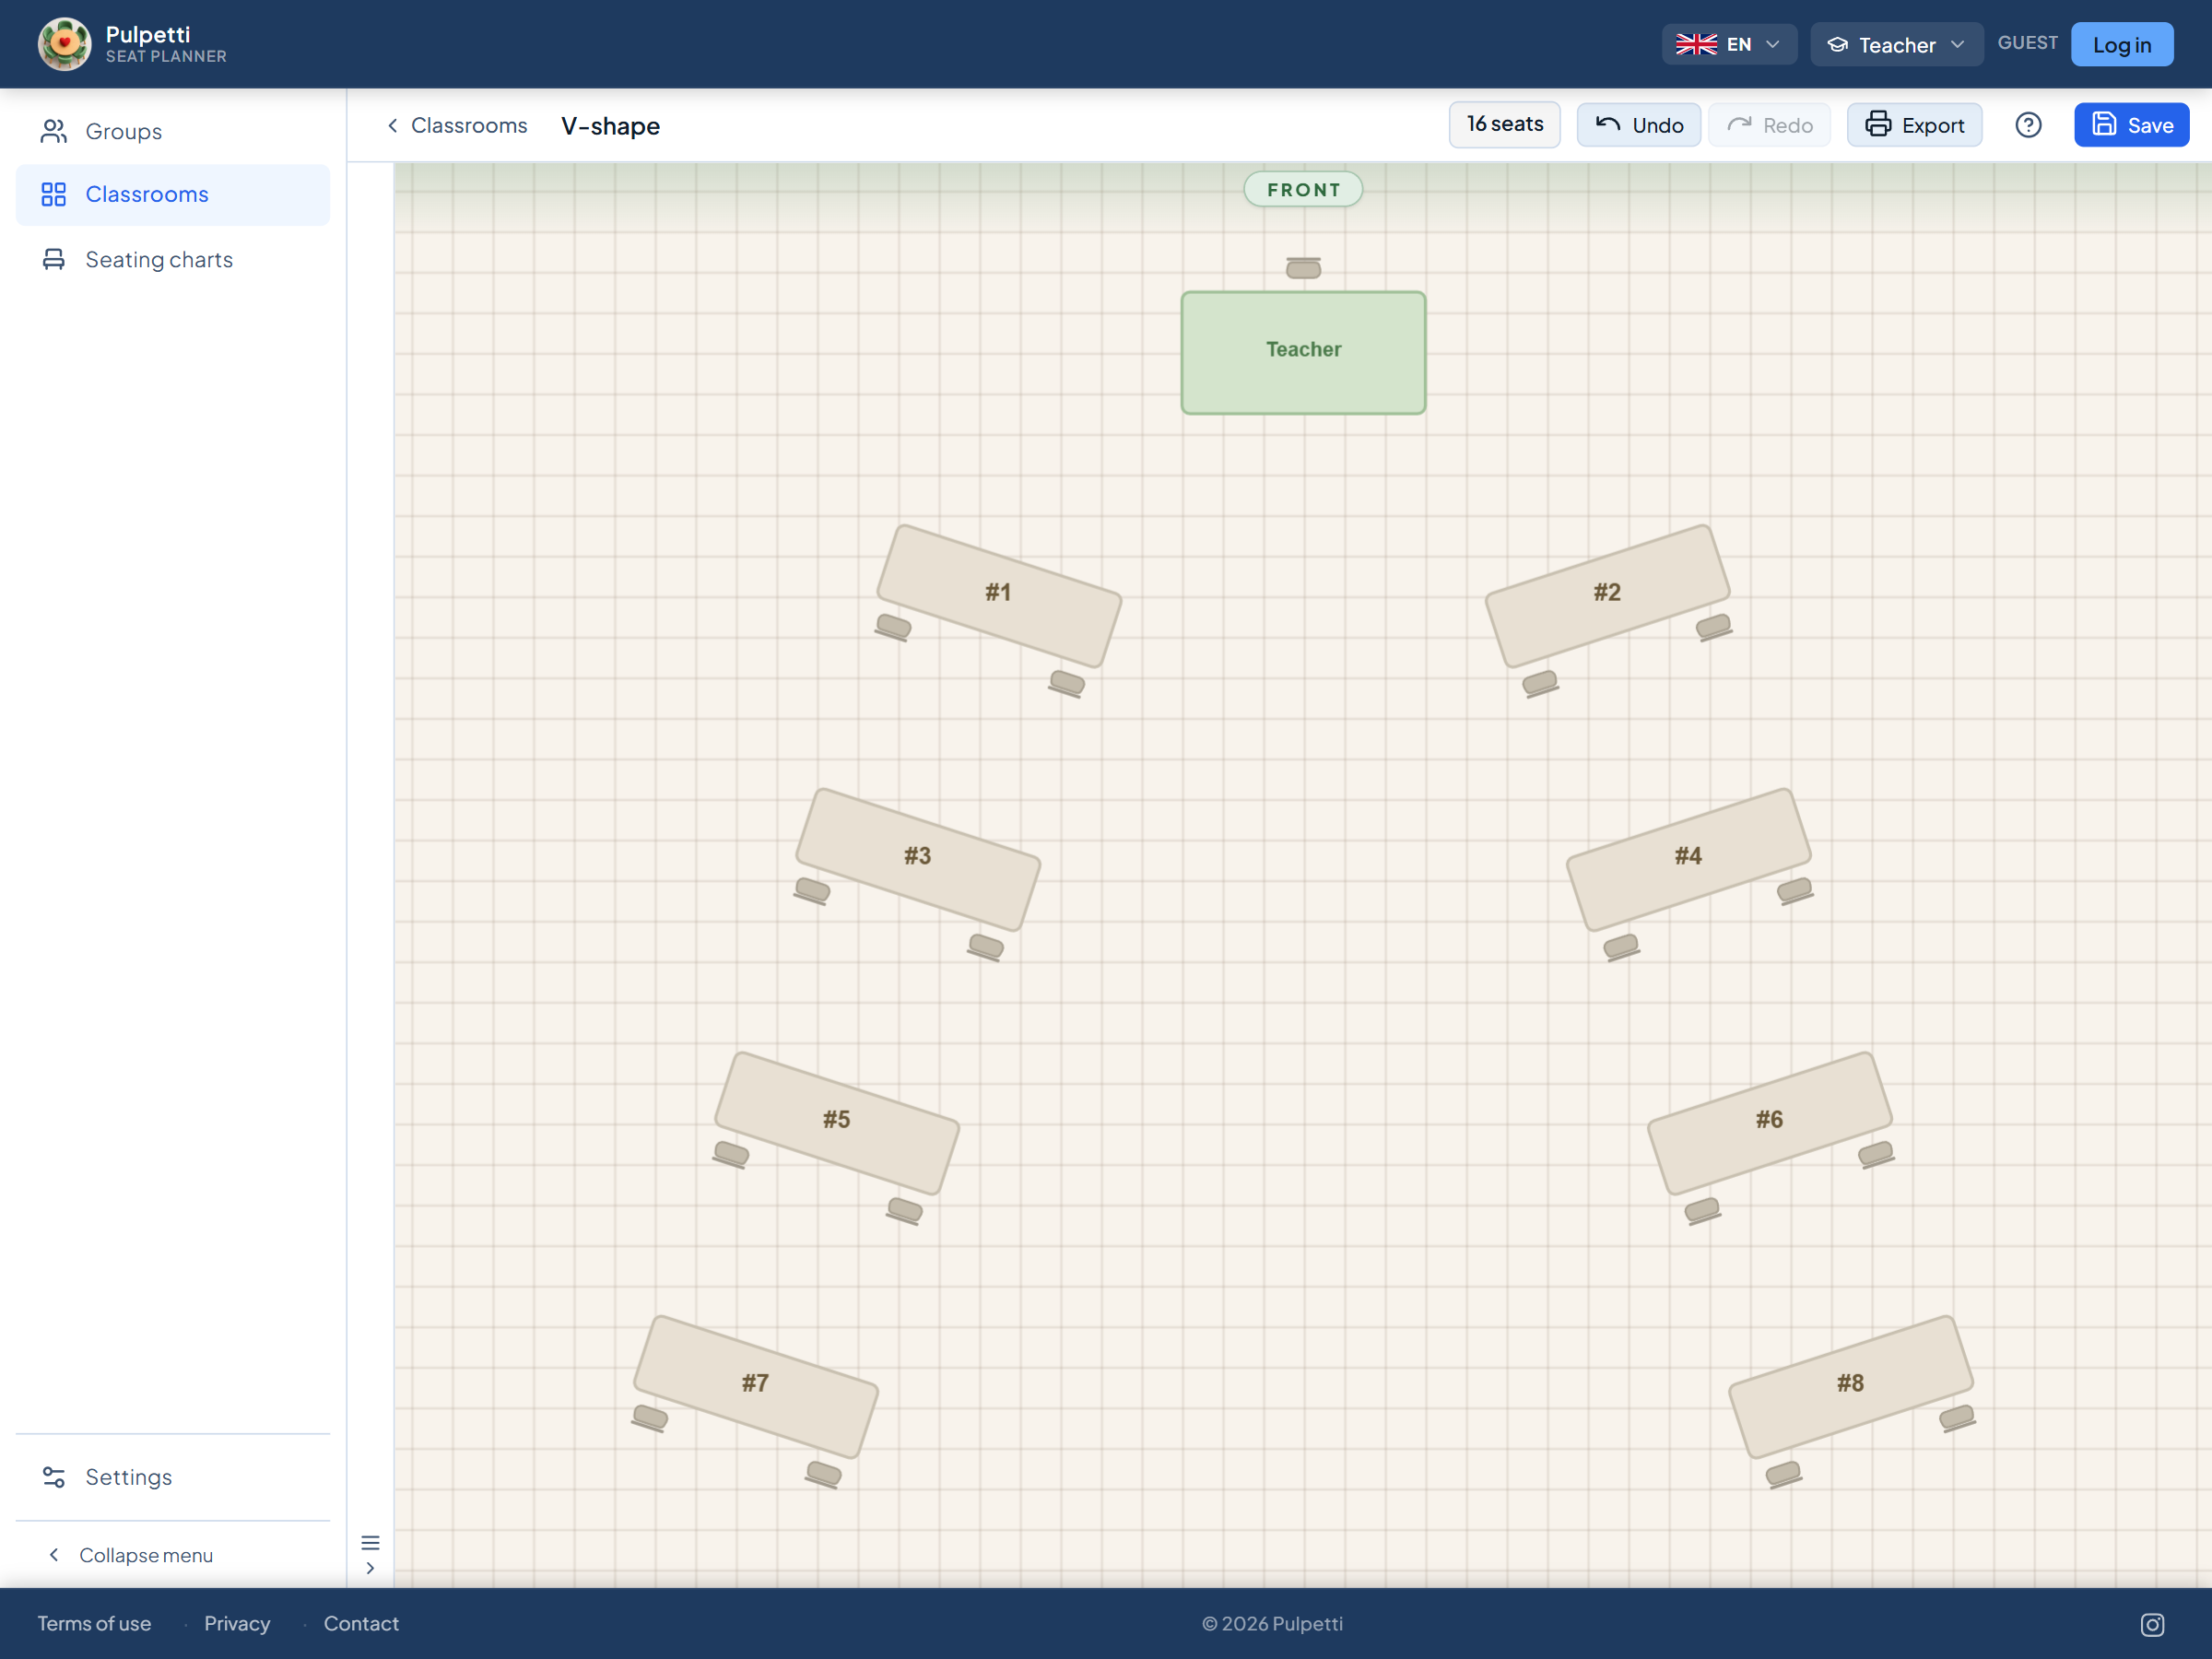
A V-shape (chevron) is rows with the two halves angled toward the front. Students see the board and also see part of the class across the V, so it carries more discussion than straight rows without losing the front. Angled desks need more floor than straight ones, so expect a few seats fewer than in rows.
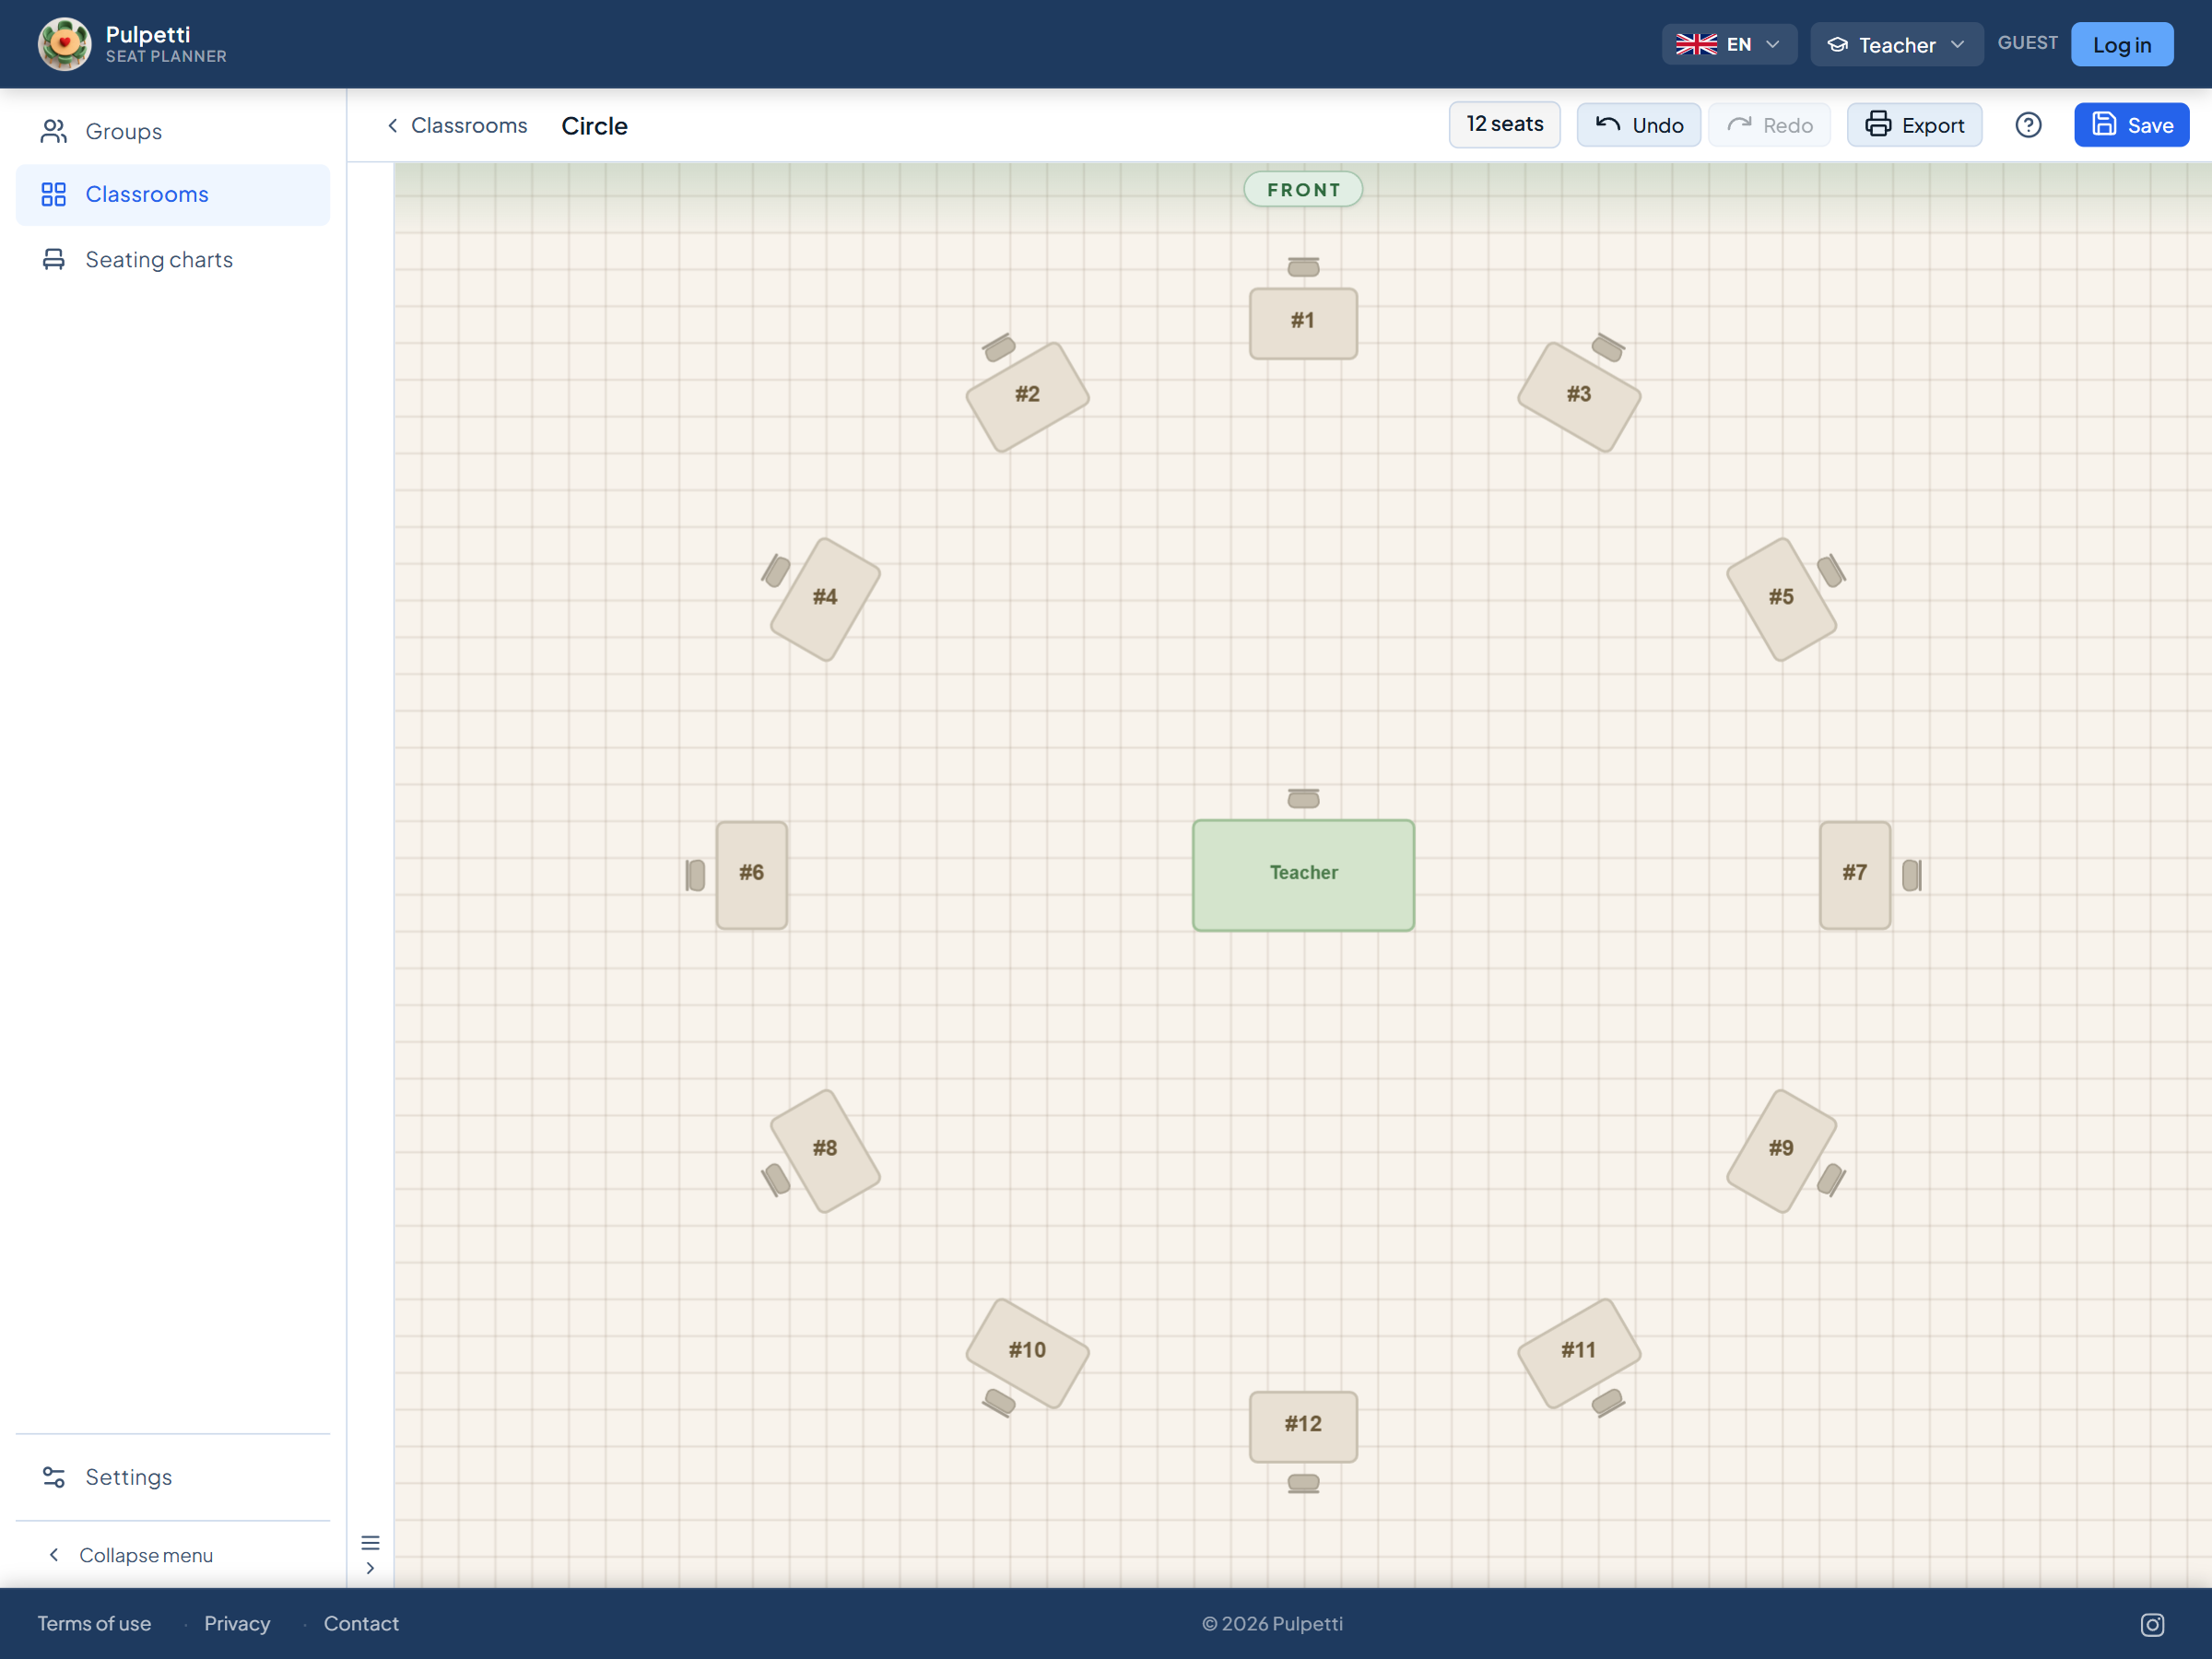
A circle has no front at all. It is the layout for a morning circle, a class meeting, a debate or a reading discussion — situations where the teacher is one participant rather than the center. With desks it takes a lot of floor for few seats; many classes do it with chairs only and keep the desks pushed to the walls.
Exam layout
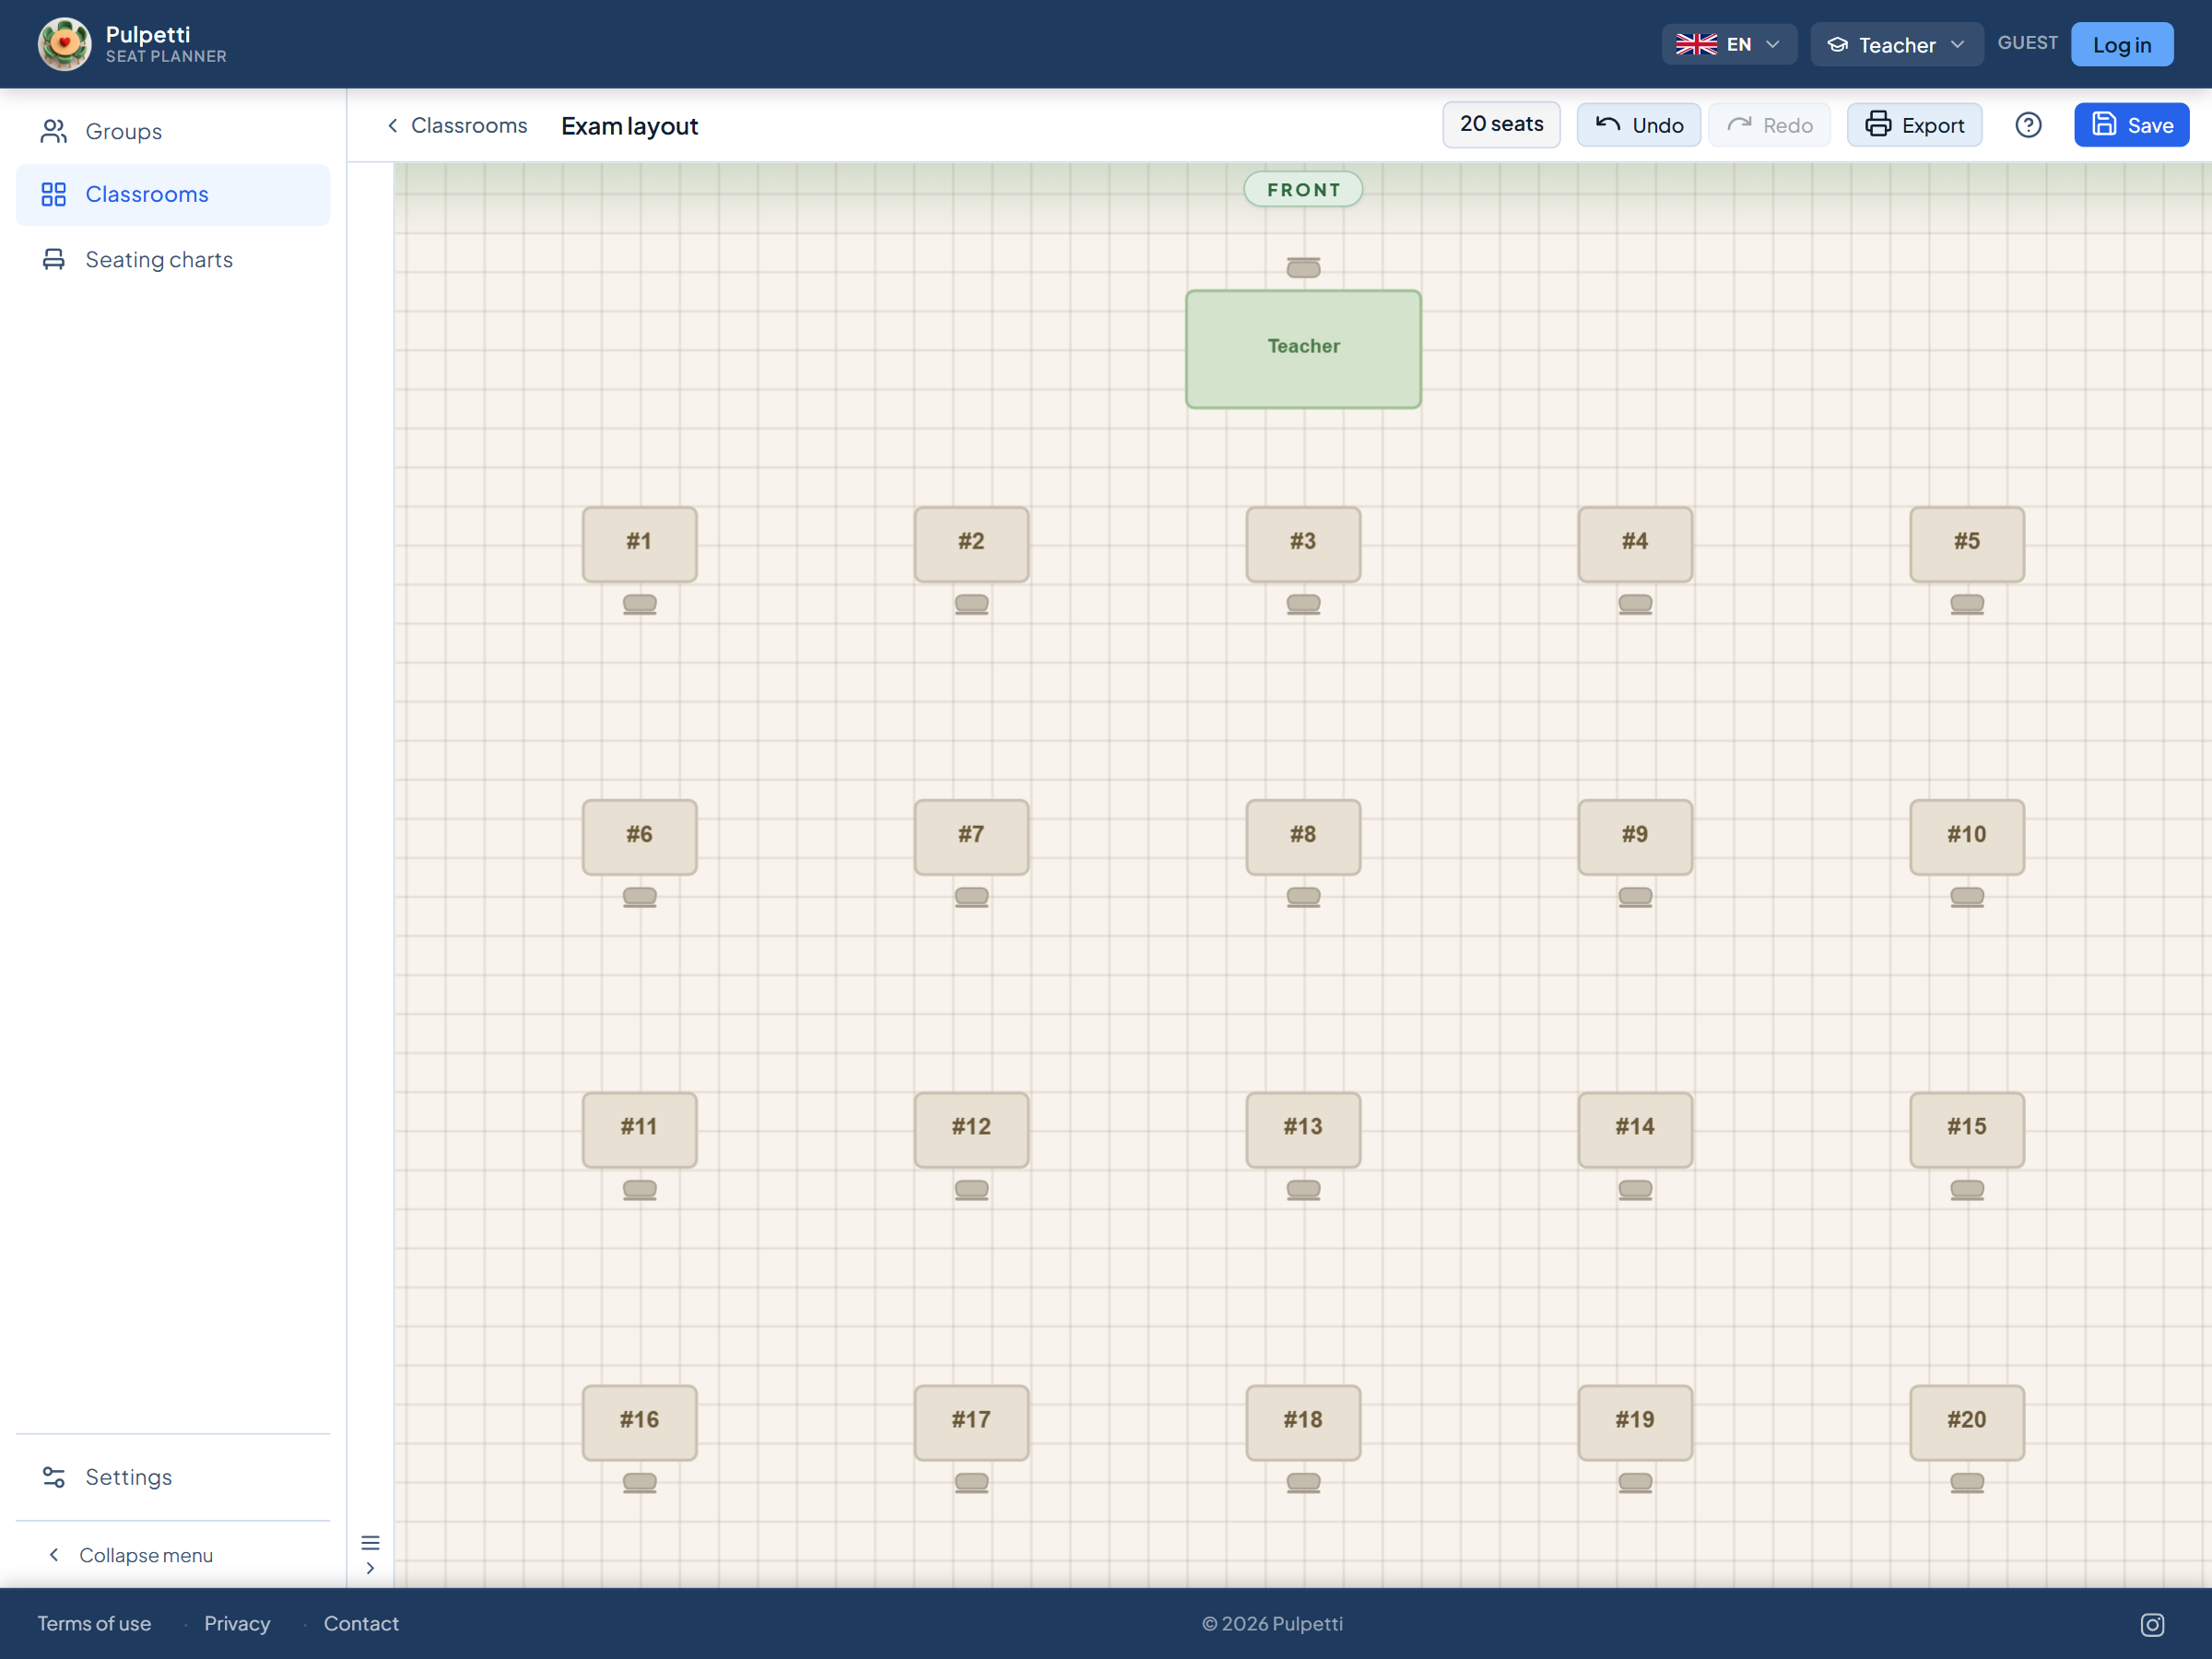
An exam layout solves a different problem from the everyday one: distance and line of sight. Single desks stand apart, all facing the same way, with a walkway that reaches every desk without passing behind another student's chair. The price is about a third of the seats, so a full class in an ordinary room may not fit — check it before exam day, not on it.
Since exam week comes round every term, the exam layout is worth saving as a layout of its own rather than rebuilding it each time. The classroom seating guide covers how it fits with the everyday seats.
How much floor a layout needs
The seat counts in the table above come from four measurements. They are working figures from classroom furniture, not regulations — your school or local rules may set their own, and those win.
| Measurement | Imperial | Metric |
|---|---|---|
| Single student desk | about 24–26″ × 18–20″ | about 65–70 × 50 cm |
| Two-seat desk | about 50″ × 20″ | about 130 × 50 cm |
| Behind a desk for the chair | 30″ | 75 cm |
| Walkway between desks | 24–36″ | 60–90 cm |
| Front zone for the board and teacher's desk | about 5 ft | about 150 cm |
Worked through for rows: each single desk with its walkway takes about 50 inches (125 cm) of width, and each row with its chair space about 50 inches (125 cm) of depth. In a 30-foot-wide room that gives seven desks across; in 18 feet of depth behind the front zone, four rows. Seven times four is 28.
The quick rule for a whole room is about 25 square feet (2.3 m²) of floor per student in rows, once the front zone, the chairs and the walkways are counted. The 690-square-foot room in the table works out at 28, and every layout that leaves the middle open needs more per student. If the count comes out short, the first thing to try is two-seat desks: pairs share a walkway and gain a column.
The walkways matter more than they look. A student who has to squeeze past three chairs to reach the pencil sharpener interrupts three students; a desk you cannot reach is a desk you do not check. At least one route from the door should reach every desk, and that route also has to stay clear for an evacuation.
Layouts for 24, 30 and 32 students
- 24 students fit every layout in an ordinary room, including a single U-shape and a circle. This is the class size where you can choose the layout purely by the lesson.
- 30 students rule out a single U and make the circle tight. Rows, pairs, a double U and six groups of five all work.
- 32 or more is where pairs with a center aisle earn their place: two-seat desks fit four columns of pairs across a 30-foot room, eight seats a row. Groups of four need eight tables, which takes most of the floor.
Whatever the size, count the seats on the plan before you count them on the floor — moving 30 desks to find out that 28 fit is an afternoon you do not get back.
Drawing the classroom floor plan
Plan the layout on paper or screen first, in this order:
- Measure the room and mark what cannot move: the door, the windows, the board, power outlets, the sink, built-in cupboards.
- Mark the front. The board decides where the front is, and the front decides which way the desks face. A layout drawn without a front tends to put someone with their back to the board.
- Keep the routes clear from the door to every desk and to the places students go during a lesson: the bin, the sharpener, the shelf with the books.
- Place the furniture, then count the seats and compare the count with the class list.
- Only then the names. Who sits where is a separate decision — the classroom seating guide goes through it.
In Pulpetti the eight layouts in this guide are ready-made templates: pick rows, a U-shape or group tables and the desks appear on the plan, the seat counter shows how many students they hold, and you can push individual desks wherever your room needs them. Give the room its real dimensions in feet or meters and the plan shows whether the layout fits before you move a single desk. The same class can keep several layouts — everyday rows, group work and the exam layout — and switch between them by opening a different one.